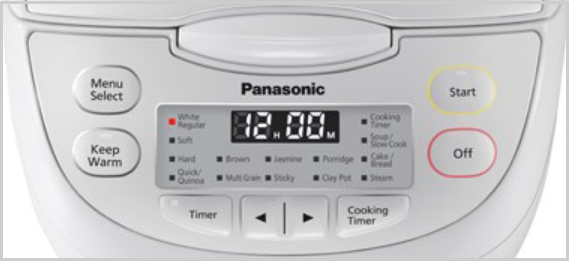
Rice Cooker Timer and Control Panel Repair Tips
Table of Contents
A rice cooker’s timer and control panel are the brains of the appliance—regulating temperature, cooking duration, and keeping your rice warm after cooking. When they malfunction, even a high-quality unit can become frustrating to use. Fortunately, many issues with timers or control panels can be diagnosed and fixed at home without replacing the entire cooker.
Common Signs of Timer or Control Panel Problems
Before taking apart your rice cooker, it helps to recognize the signs that point to control system issues. Typical symptoms include:
- The timer not starting or stopping properly
- Unresponsive or flickering buttons
- Incorrect time display or blinking digits
- Cooking cycle not initiating when you press “Start”
- Sudden power cut-offs mid-cycle
If you notice any of these, the issue likely lies in the control board, wiring, or a worn-out electronic component such as a capacitor or switch.
How to Troubleshoot Timer or Control Panel Issues in a Rice Cooker

Step 1: Unplug and Inspect Safely
Always unplug your rice cooker before attempting any repair. Begin with a visual inspection of the exterior and control panel. Look for cracked buttons, loose connectors, or burned spots around the power socket.
If your model has a removable front or top panel, carefully open it using a screwdriver—taking care not to damage the clips or wiring inside.
Step 2: Check for Moisture and Residue
Steam and condensation are common culprits behind malfunctioning timers. Moisture can seep into the control panel, causing corrosion or short circuits.
Use a soft, dry cloth to wipe down the inside of the panel, and if you see any greenish corrosion around connectors, gently clean it with a cotton swab dipped in isopropyl alcohol. Let everything dry thoroughly before reassembling.
Step 3: Examine the Wiring and Connectors
Inside most rice cookers, the control panel connects to the heating plate and sensor through a set of color-coded wires. Over time, heat and vibration can loosen or fray these wires.
Check for loose plugs, burnt ends, or melted insulation. If any wires appear damaged, replace them with wires of the same gauge and rating. Tighten all connectors before closing the lid.
Step 4: Test the Buttons and Circuit Board
If your control buttons don’t respond, the membrane switch or tactile pads beneath them might be worn out. You can test continuity using a multimeter.
Place the probes on the button’s contact points and press it. If there’s no change in the reading, the switch is faulty. Replacement membranes are inexpensive and often specific to your cooker model.
For circuit boards, look for swollen capacitors or burnt resistors. A swollen capacitor looks slightly rounded at the top instead of flat. Replacing damaged components may fix timing errors or unresponsive displays.
Step 5: Reset or Recalibrate the Timer
Some modern rice cookers include a reset or calibration function accessible through the control panel.
Check your user manual for instructions on resetting the timer settings. In older models, unplugging the cooker for 30 minutes can sometimes reset the internal microchip and restore normal operation.
Step 6: Replace the Control Panel Module
If the above steps don’t solve the issue, you might need to replace the entire control module. Many brands sell replacement panels online.
Before buying, confirm the part number printed on your existing board. Installing a new one usually involves unplugging the old connectors, fitting the new board, and securing it with the original screws. Always ensure proper alignment before powering up.
Preventing Future Issues

To extend the lifespan of your rice cooker’s timer and control system:
- Avoid spilling water or rice inside the control panel
- Keep the cooker away from damp environments
- Unplug after every use to prevent voltage surges
- Clean the exterior regularly to prevent buildup
- Do not press buttons with wet fingers
Simple habits like these can keep your appliance functioning smoothly for years.
When to Call a Professional
If your cooker still fails to work after cleaning and part replacement, the microcontroller or main power relay may be damaged. These components require specialized tools and soldering skills, so it’s best to take the unit to an authorized repair center.


