How to Make Yogurt in a Rice Cooker
Making yogurt at home sounds complicated, but once you learn how to make it in a rice cooker, it becomes one of the easiest kitchen projects you can try. A rice cooker provides steady heat, controlled temperature, and a closed environment that helps milk ferment into smooth, tangy yogurt.
This method works even if you don’t own a yogurt maker, slow cooker, or oven. All you need is milk, a starter culture, and patience.
Not Just for Eating Rice: Why Rice Cookers Work For Yogurt Fermentation
A rice cooker is ideal for yogurt because it can:
- Maintain low, steady heat
- Use a warm setting for fermentation
- Keep the pot covered with a lid
- Avoid high heat once the culture is added
You can use an Aroma rice cooker or any electric cooker with a “warm” menu. Even basic models without special yogurt settings work.
The key is temperature. Yogurt bacteria thrive around 110°F (43°C). Too much heat kills the culture, and too little heat slows fermentation.
Homemade Yogurt Ingredients and Equipment You Need
Ingredients
- 4 cups milk (whole milk makes yogurt thicker)
- 2 tablespoons plain yogurt with live culture
- Optional: honey or fruit
Equipment
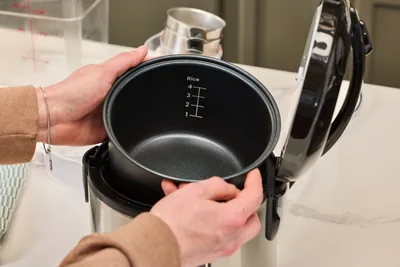
- Rice cooker bowl
- Thermometer (optional but helpful)
- Whisk or spoon
- Lid or cover
Homemade Yogurt Recipe: Step-by-Step Cooking and Fermentation Process
Heat the milk properly
Pour milk into the cooker bowl. Use the cook or steam setting until it reaches near boil (about 180°F). Stir the milk gently to prevent sticking.
Cool the milk to the right temperature
After boiling, remove the pot, cover it, and wait until the remaining milk cools to about 110°F. Regularly measure the temp using athermometer. If the milk is too hot, it will destroy the culture immediately.
Mix in the yogurt starter culture
In a cup, begin to mix a small portion of warm milk with the yogurt starter. Whisk until smooth. Pour back into the pot and stir gently.
Close the lid and allow fermentation
Place the cooker bowl back in the rice cooker. Press the warm setting. Close the lid and leave it for 6–8 hours without stirring.
Check texture and whey separation
The yogurt should appear thick with some whey on top. For thicker yogurt, leave it for longer or strain the whey.
Refrigerate the finished yogurt
Transfer into containers and refrigerate for at least 2 hours before eating.
How Yogurt Fits Into Rice-Based Meals
Yogurt pairs well with rice-based dishes. In Korea and other Asian cultures, yogurt is often enjoyed to cool the palate and support digestion after spicy or heavy meals.
You can serve yogurt with:
- Steamed rice and fruit
- Honey and nuts
- As a side dish
- In smoothies or baked recipes
This makes your rice cooker useful beyond just cooking rice.
Tips for Thicker Yogurt and Improved Flavor
- Use whole milk
- Add powdered milk for thickness
- Strain whey using cheesecloth
- Do not stir the milk and starter while fermenting
- Let yogurt sit longer for tangier flavor
- Transfer to containers and refrigerate immediately after fermentation
Flavor the milk and starter after fermentation using:
- Honey
- Fruit
- Vanilla
- Cinnamon
Avoid adding sugar to the milk and starter during fermentation because it can interfere with the culture.
Storing and Reusing Yogurt Batches
- Store in airtight containers in the refrigerator
- Keeps fresh for 7–10 days
- Save 2 tablespoons as starter for the next batch
- Wash the cooking bowl thoroughly between batches
Each batch can be reused to create the next one.
Final Thoughts on Making Yogurt in a Rice Cooker at Home
Learning to cook yogurt in a rice cooker turns a simple appliance into a fermentation tool. It saves money, gives you control over ingredients, and produces healthier yogurt with better texture and flavor.
Whatever appliance you use, the recipe process remains the same: heat the milk, cool it, add culture, and allow time to ferment. With practice, you’ll master the method and enjoy fresh yogurt anytime.
Frequently Asked Questions
Can you use a rice cooker to make yogurt?
Yes. A rice cooker provides a stable, warm heat that allows bacteria to ferment milk into yogurt safely and consistently.
Can I make yogurt without a yogurt maker?
Yes. You can use a rice cooker, slow cooker, microwave (for heating only), or on the stove top with a pan. The rice cooker is one of the easiest methods because it locks in warmth with minimal electricity and effort. All you have to do is plug in the appliance and follow the easy recipe above.
How can I make homemade yogurt quickly?
To speed up the process:
- Keep the warm setting steady
- Use fresh starter culture
- Close the lid completely
- Monitor the thermometer and maintain a temperature between 105–115°F
Fast batches have a cooking time of 4–6 hours, but longer fermentation improves taste and texture.
Can I heat milk using a microwave instead of a stove?
Yes, you can heat the milk in the microwave or in a pan before transferring it to the rice cooker. Be sure to measure the temperature so it cools to about 110°F before you insert the yogurt culture.
Which buttons should I use on my cooker for yogurt fermentation?
Simply press the warm function and avoid high-heat cooking modes. Do not press any other buttons once fermentation begins, and use the standard menu setting if your cooker has no yogurt option. After heating and cooling the milk, insert the starter and leave it undisturbed.
Why does liquid separate from my yogurt?
The liquid you see is called whey, which is a natural byproduct of fermentation. You can gently warm the mixture again in a clean pan if needed, then strain or stir it back in and cover the container while it sets.
How should I store homemade yogurt safely?
You should store your finished yogurt in airtight containers in the refrigerator for up to 7–10 days. For example, small glass jars work well for keeping flavor fresh and preventing spills.